5. Composing map layouts
Map composition (layout) is realized in the Layout Composer.
Exercise: Compose the map layout of neonatal mortality rate in Cambodia (number of deaths during the first 28 completed days of life per 1,000 live births in a given year or period)
- First you need to render and symbolize your data in the map canvas as you want them to appear in a the map layout
- Create a Print Layout
- Project / New Print Layout…
- Give a name to your layout and click OK
- A right-click on the white page allows to open Page properties and set up the page size (for example A4 landscape)
- Add your map:
- Go to “Add item” Menu / Add Map or Click the button “Add a new map to the layout”
- Draw the extent of map on your canvas
- The map from your QGIS is displayed
- Use the “Move item content” button to move you map within its box
- You can check “Lock layers” and “Lock styles for layers” to fix your map
- You can redo add map to add a second one. Then, you need to go back to GIS main window to choose the display of your map canvas you want to show in the second map
- Add a scale bar:
- Go to “Add item” Menu / Add Scale Bar
- Place your scale bar on the map
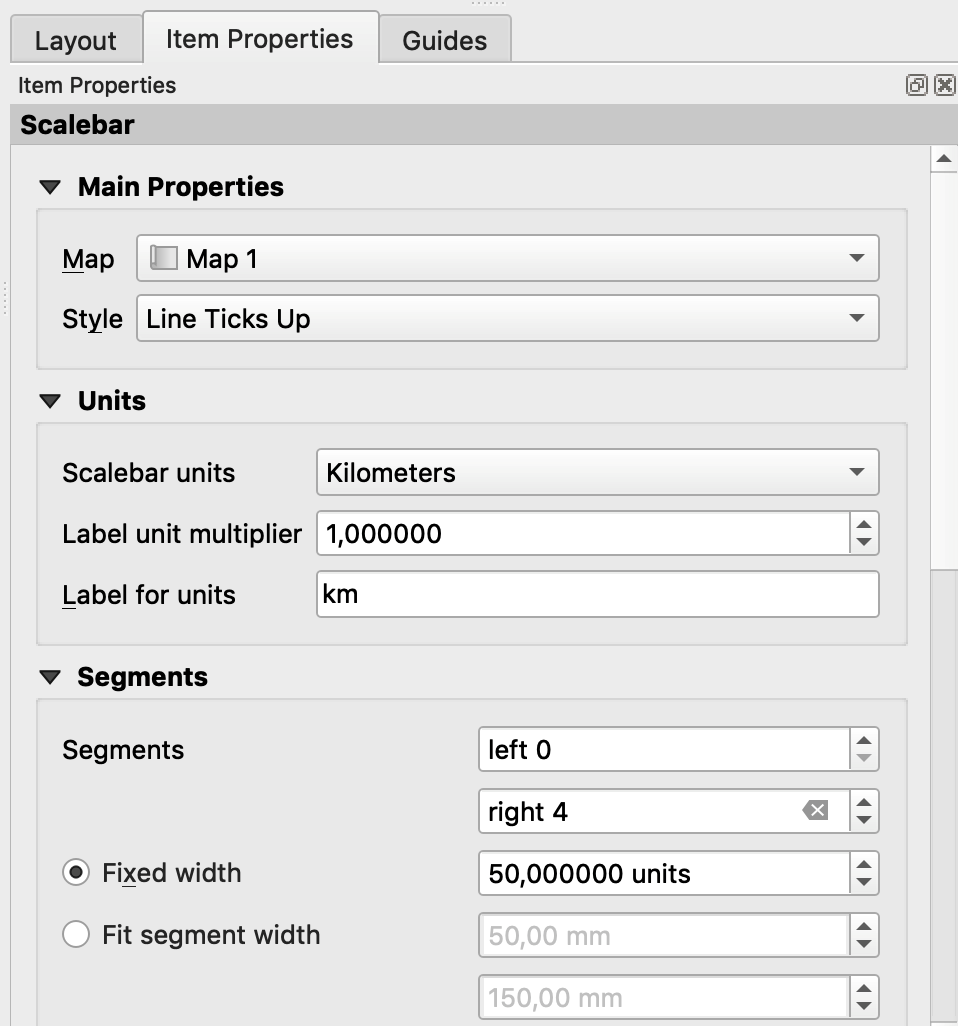
- When the scale bar is selected, you can adjust its properties in the Item Properties window
- Choose the style of the scale par in “Main properties”
- Choose the Units: here: 1 km
- Choose the number of Segments: here 50 units
- You can further adjust fonts, margins, etc.
- Add a scale bar:
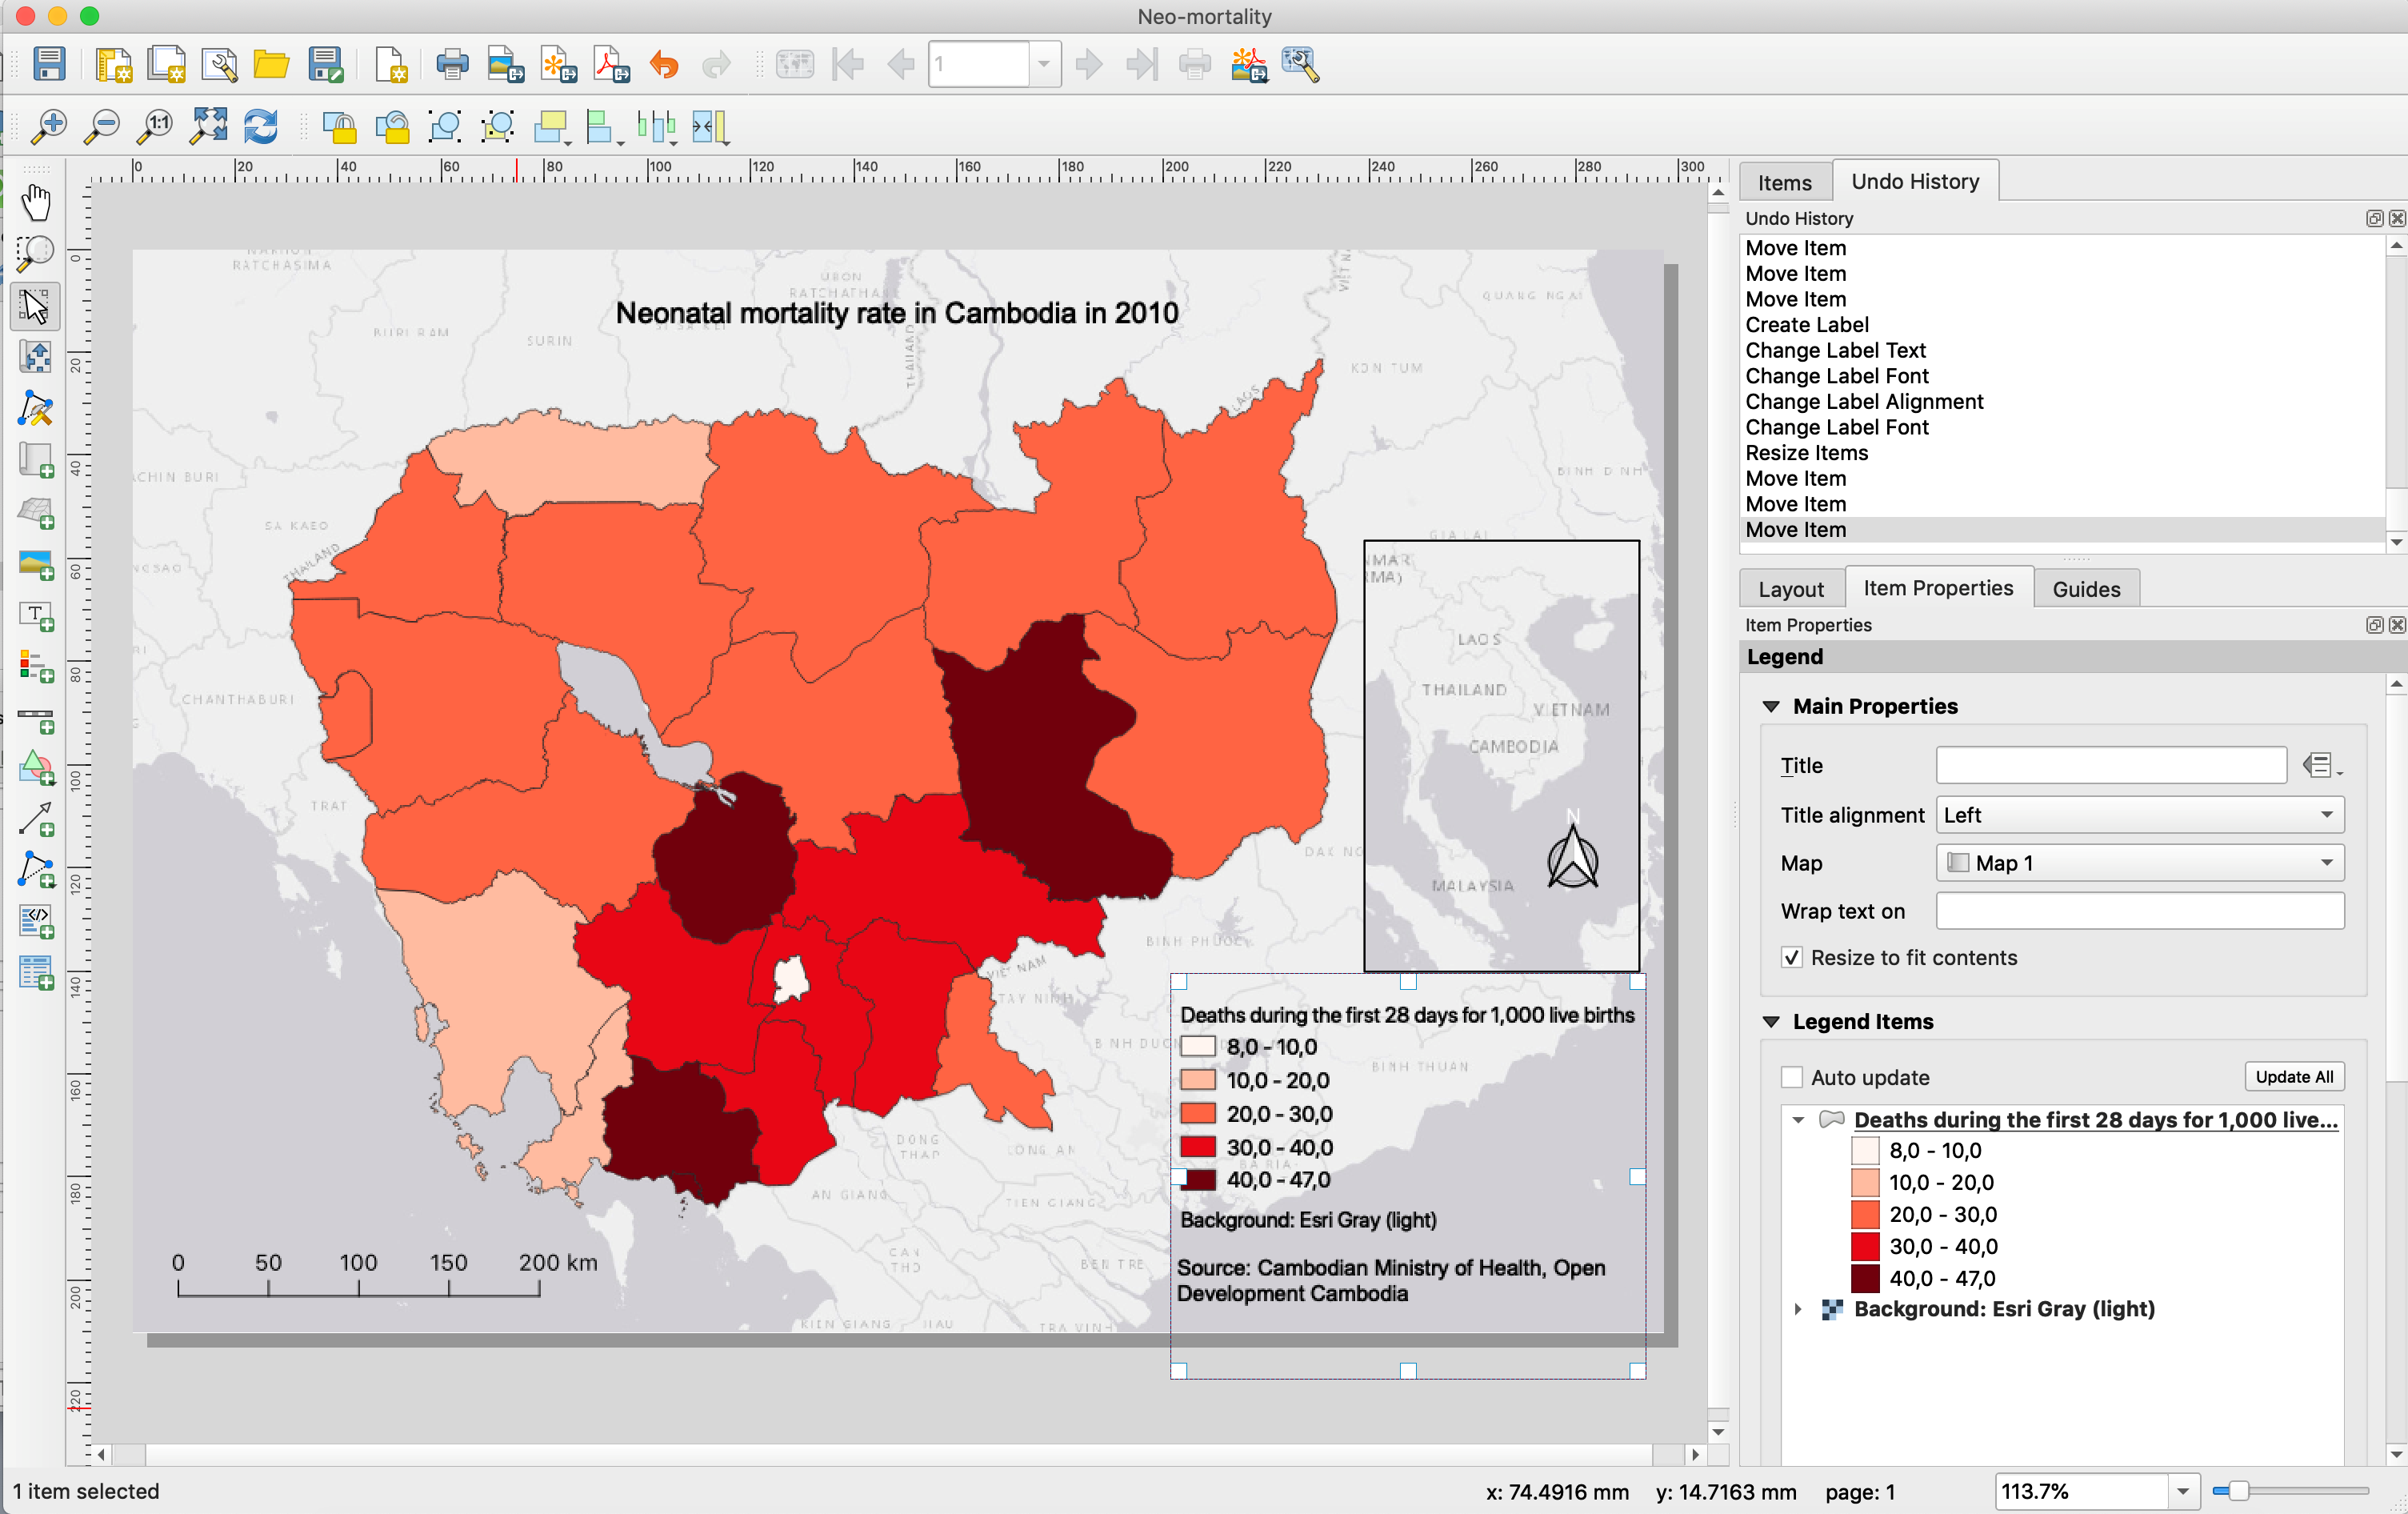
- Add a legend:
- Go to “Add item” Menu / Add Legend
- Place your legend on the map
- When the legend is selected, you can adjust its properties in the Item Properties window
- In the Legend items: uncheck “Auto update” to remove some parts of the legend or reorder
- You can double-click on a layer name to modify it
- You can further adjust fonts, margins, etc.
- You can uncheck background for a transparent one
- Add a legend:
- Add a North arrow:
- Go to “Add item” Menu / Add Picture
- Place the picture on the map
- In the “Search Directories”, look for a compass or North arrow
- Add a North arrow:
- Add Text for title, sources, etc.
- Go to “Add item” Menu / Add Label
- Add Text for title, sources, etc.
- Export maps:
- In the Layout tab, should the export resolution (300 dpi is advised for fine printing)
- Export as image or as pdf, depending on your needs
- Export maps: